Accessibility Checkers
What are accessibility checkers?
An accessibility checker is a tool that generates a report of accessibility issues within your document or content. Some accessibility checkers even explain why and how to fix the issues.
Why should we use accessibility checkers?
All documents (e.g. syllabi, PowerPoints, schedules) that are shared with students, faculty, and staff must be accessible. Accessibility checkers can help you identify and correct accessibility issues easier. Please keep in mind that accessibility checkers are not perfect and do not catch all accessibility issues, but they can assist in pointing out some of the more egregious errors.
How do I run an accessibility check?
Using an accessibility checker in Microsoft Word:
-
-
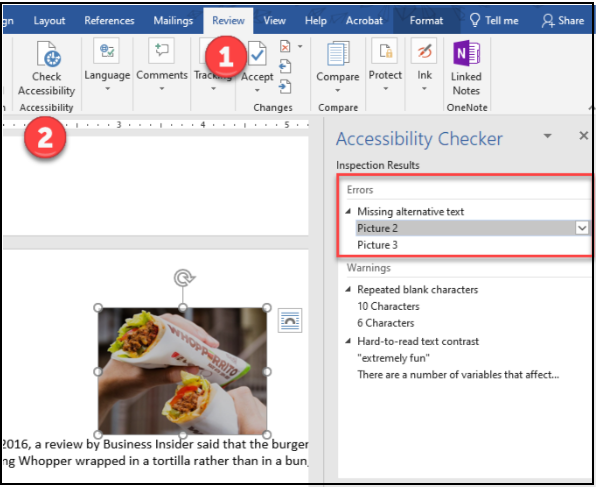
- Click on "Review" in the Nav Bar.
- Select "Check Accessibility."
- Correct any errors and review any warnings that populate in the Accessibility Checker pane.
-
Using an accessibility checker in Adobe Acrobat:
-
-
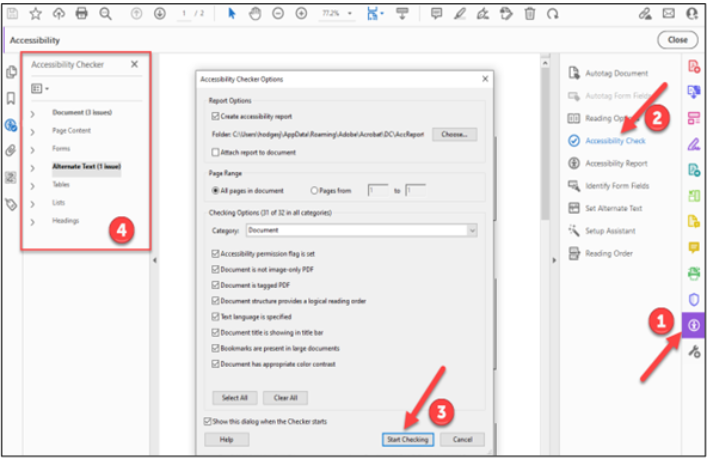
- Open the Accessibility Tool.
- Select "Accessibility Check."
- Click on "Start Checking."
- Review and correct any issues that populate in the Accessibility Checker pane.
-
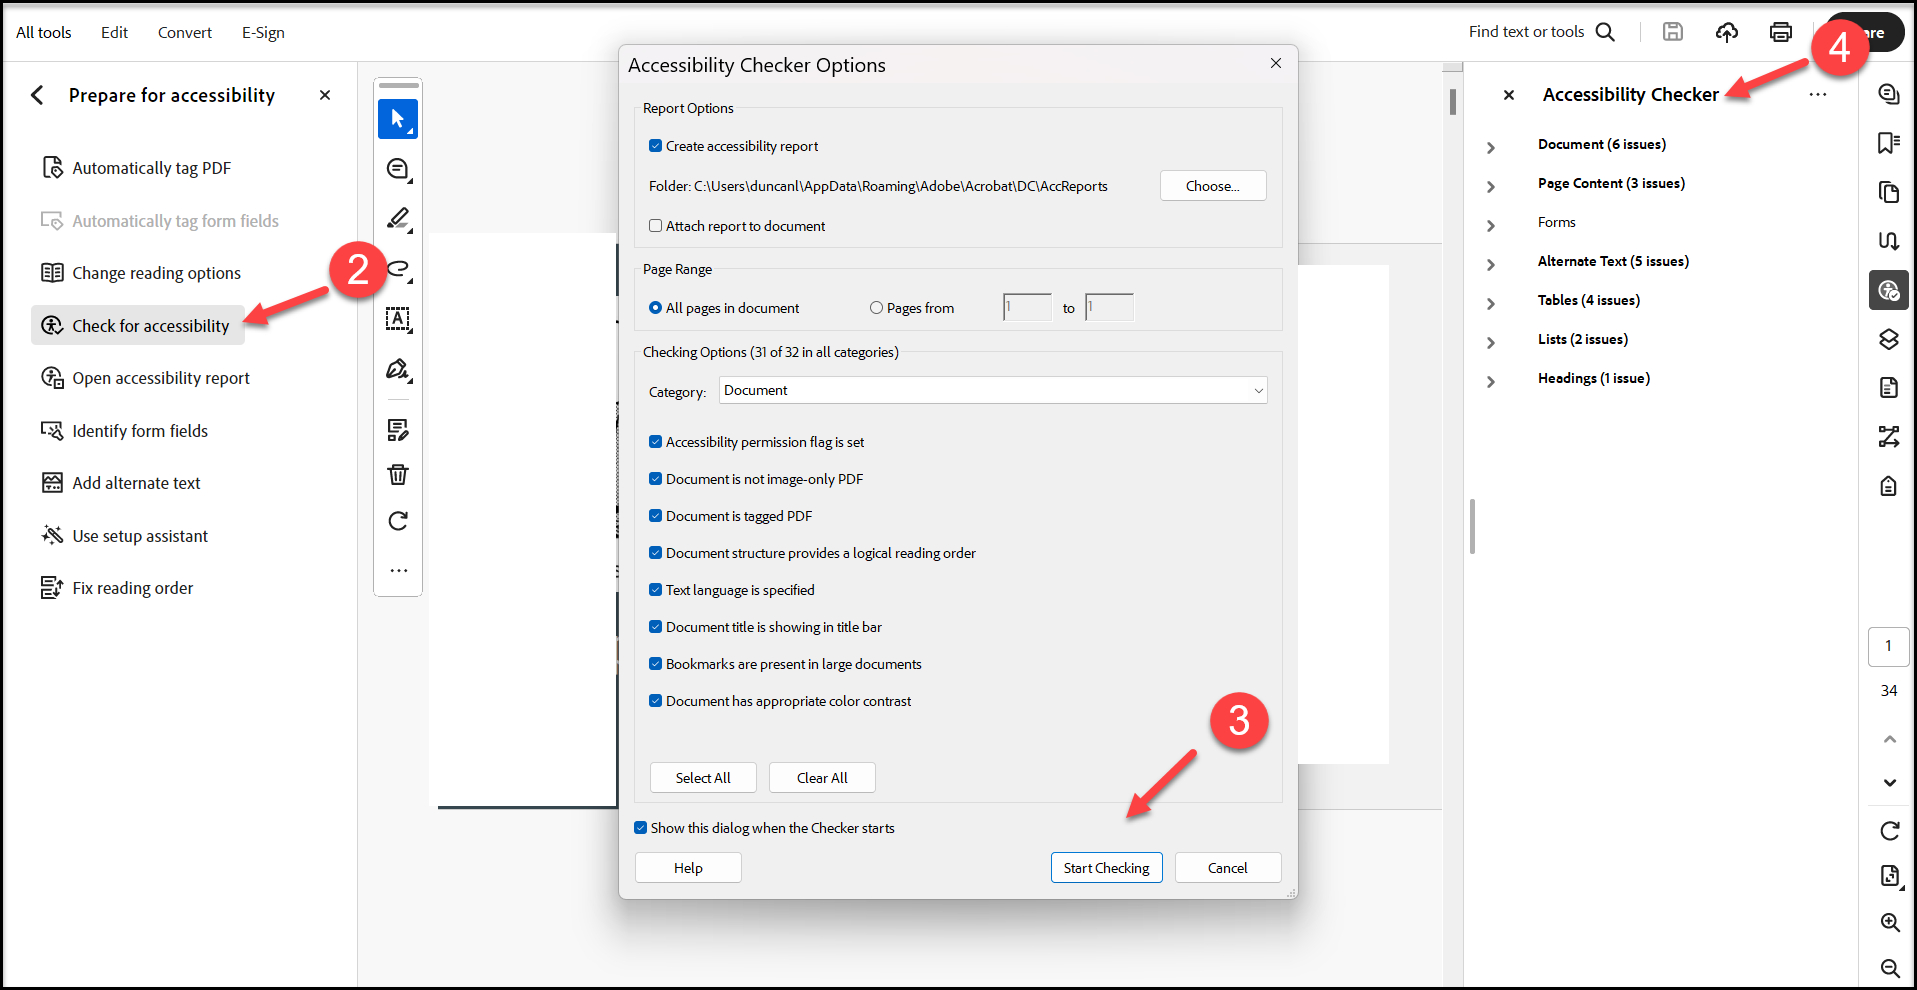
Using an accessibility checker in the new Adobe Pro experience:
-
-
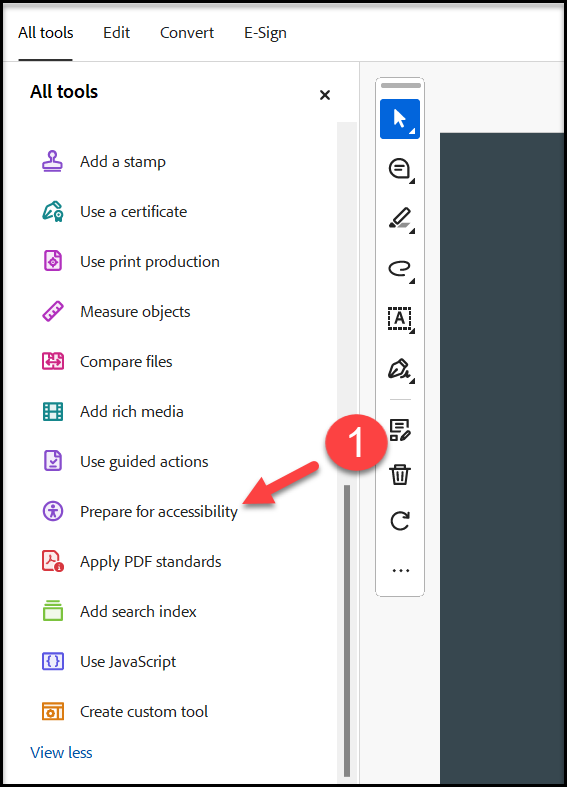
- Select “Prepare for accessibility” under All tools.
- Click on "Check for accessibility."
- Click on "Start Checking."
- Review and correct any issues that populate in the Accessibility Checker pane.
-
Using an accessibility checker in D2L’s HTML editor:
-
-
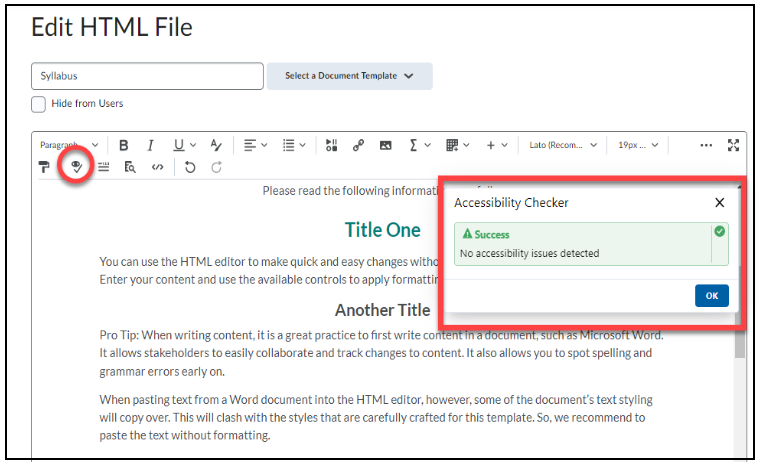
- When editing the HTML file, click on the Accessibility Icon (looks like an eye with a check mark).
- Review and correct the detected issues in the Accessibility Checker window.
-
