How to Edit a webpage

Get Started by Checking in
- Check in the page using the light bulb in the top right corner
- Use the green buttons to open the edit panel (main content and sidebar panels)
Add your content to the page
There are two ways that you can add content to the page: Copy and Paste or type directly on the page.
Copy and Paste
You can copy and paste ready made content from outside the website or other pages. There are a few things to keep in mind:
- Right click Copy & Paste doesn't work. Instead use keyboard shortcuts or the toolbar.
- Be sure to clear the formatting of anything you copy and paste into the site.
- Most of the formatting is already controlled by the websites CSS. (Font, Font size, Line Spacing, etc.)
Typing
You can just type out your message just like editing a word document.
- Tip: if you don't want to double space when you hit enter to go to the next line, hold shift while hitting enter so that its single spaced. This works great for addresses and titles.
- Bulleted points and numbered list are automatically single spaced.
Jacob Culwell
Campus Webmaster
(931) 221-7453
culwellj@apsu.edu
Proper Use of Headings
- You can control the size of text by using the dropdown on the second line of your toolbar. First highlight the text and then select the appropriate choice from the drop down.
- Guidelines for Heading Use:
- The first heading at the top of the page is always an h1. It will be the only h1 on the page.
- The following headings will get smaller in a collapsing manner.
- Most of the content on your page will use the paragraph selection.
Why is this important?
Because Google said so.
What about Hyperlinks?
To create a hyperlink:
- Highlight the words that you want to become a Hyperlink
- select the link tool icon from the toolbar (looks like a chainlink)
- In the Insert/Edit link box you will see several options:
- URL: if you a linking to something outside the APSU website then you can paste the link in this box. If you are linking to something that lives on our site (page, document, image) Then click on the box with an up arrow.
- Find the file or page you wish to link to and click insert. This will insert the file's/page's
dependency tag.
- If the file or page is in an area you don't have access to edit then swap the dropdown in the top right corner to production.
- Text to Display: this is the text that you highlighted on the page. If you want you can make changes to the text here and it will reflect on the page.
- Title: Optional, this creates a pop up box if someone hovers over the link without clicking on it.
- Open In: This controls what happens when someone clicks on your link. It can either
replace the page they are viewing with the new page (current window), or it can open
a new tab in their browser (new window). See below for some tips on how to decide
which is best.
- New Window:
- Links pointing to pages outside your section or outside the APSU website
- Links pointing to documents like PDF's
- If the viewer will need to reference the current page or needs to keep reading after they have clicked the link
- Current Window:
- If you are linking to another page in your section (most of the time)
- If the view will have no need to return to this page for more information.
- New Window:
- Once the above options are filled in you can click save and your text will become a link.
- If you ever need to edit and existing link just click on it to select it and use the link tool icon to open the Insert/Edit screen.
Email Links:
To create an email link you can simply type out the email address and hit space or enter.
Example: nelshoppeno@apsu.edu
If there is other text that you wish to hyperlink to an email address then you first highlight the text then select the envelope icon from your toolbar and fill in the options. This might be handy for links that say Contact Us, or Have Questions?
Example: Have a Question?
Removing a link:
- If you need to remove the link and the text then you just delete them from the page using your backspace key.
- If you want to remove the hyperlink but keep the text then you can use the Remove Link icon in your toolbar. (Between the chainlink and envelope icons)
Adding an Image to the page

Images that have been uploaded and published inside Omni CMS can be added to the page.
- To add an image first place your cursor where you would like the image to appear.
- Then click on the Insert/Edit Image icon in your toolbars second row. (two mountain peaks with the sun)
- Like we did when linking to a page or document, you are going to use the up arrow in a box icon to search and find the uploaded image.
- Once you have selected and inserted your image, then fill out a short description of the image in the Alternative Description. This allows screen readers to read off your description when scanning a page.
- Image Title: just like with link title this is optional and provides a pop up box with what you typed in.
- Adjust the Width or Height if needed. You can also adjust this by grabbing the corner
of the image after it is on the page.
- Tip: The max width for the main Content section of most page on the APSU website is 900px. So for images going on the page of your site, there is no need for images wider than 900px.
- If you need to edit/change the image you can click on the image and follow steps 2-6.
- If you would like to delete an image you can place your cursor after the image and backspace into it.

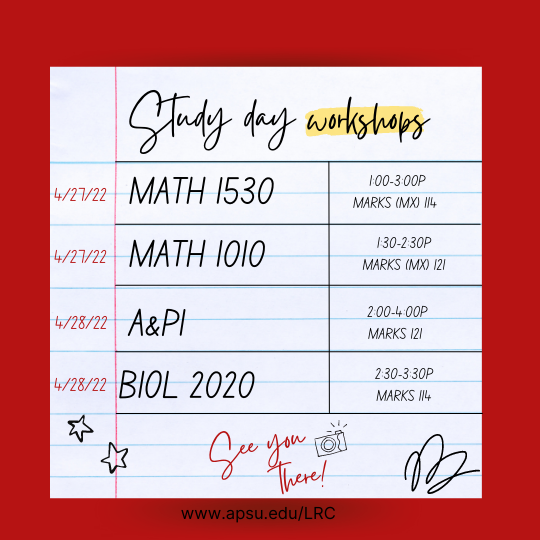
Study Day Workshops
- 4/27/22 - Math 1530 - 1:00pm-3:00pm, Marks 114
- 4/27/22 - Math 1010 - 1:30pm-2:30pm, Marks 121
- 4/28/22 - A&PI - 2:00pm-4:00pm Marks 121
Save your work! Then Publish.
Once you have finished editing your page, be sure to save your work by hitting the big blue save button in the top right or the save icon in your toolbar.
- Tip: the X icon in the toolbar is if you want to exit the page and not save your work. This is helpful to undo what you have done and start over as long as you not clicked the save button.
Once the page is saved the edit panel will close and a preview of your page will be show.
If you are happy with how the page looks and you are ready for it to go Live on the website then click on the green Publish button in top right corner.
- Some pages (top level index pages) may say submit instead of Publish. This is because these pages need to be approved by PR and Marketing before going live.
Once you have click publish it will automatically check for spelling errors and broken links. Use the linked reports to view any issues that have been found. To correct the issues cancel the publish and open the edit panel and make whatever changes are needed then save and try publishing again.
Version Description
Once the checks are done be sure to fill out the Version Description and give a short summary of what you have changed. Versions Descriptions are important! Then hit publish. Your changes are now Live for people to see!
Description Examples:
- Updated the term list for next semester.
- Added image to page.
- Updated contact email.
- Removed outdated links and info.